EMQX MQTT Broker
⚠️ Deprecated since 1.14.0!!!!
VPC Peering
Role Assignment
EMQX: https://docs.emqx.com/en/cloud/latest/
IoT Data Engine is exposing the MQTT endpoint for IOT devices through the EMQX installation (3rd party partner). The integration between EMQX and IoT Data Engine is happening through VPC peering - Virtual Network peering.
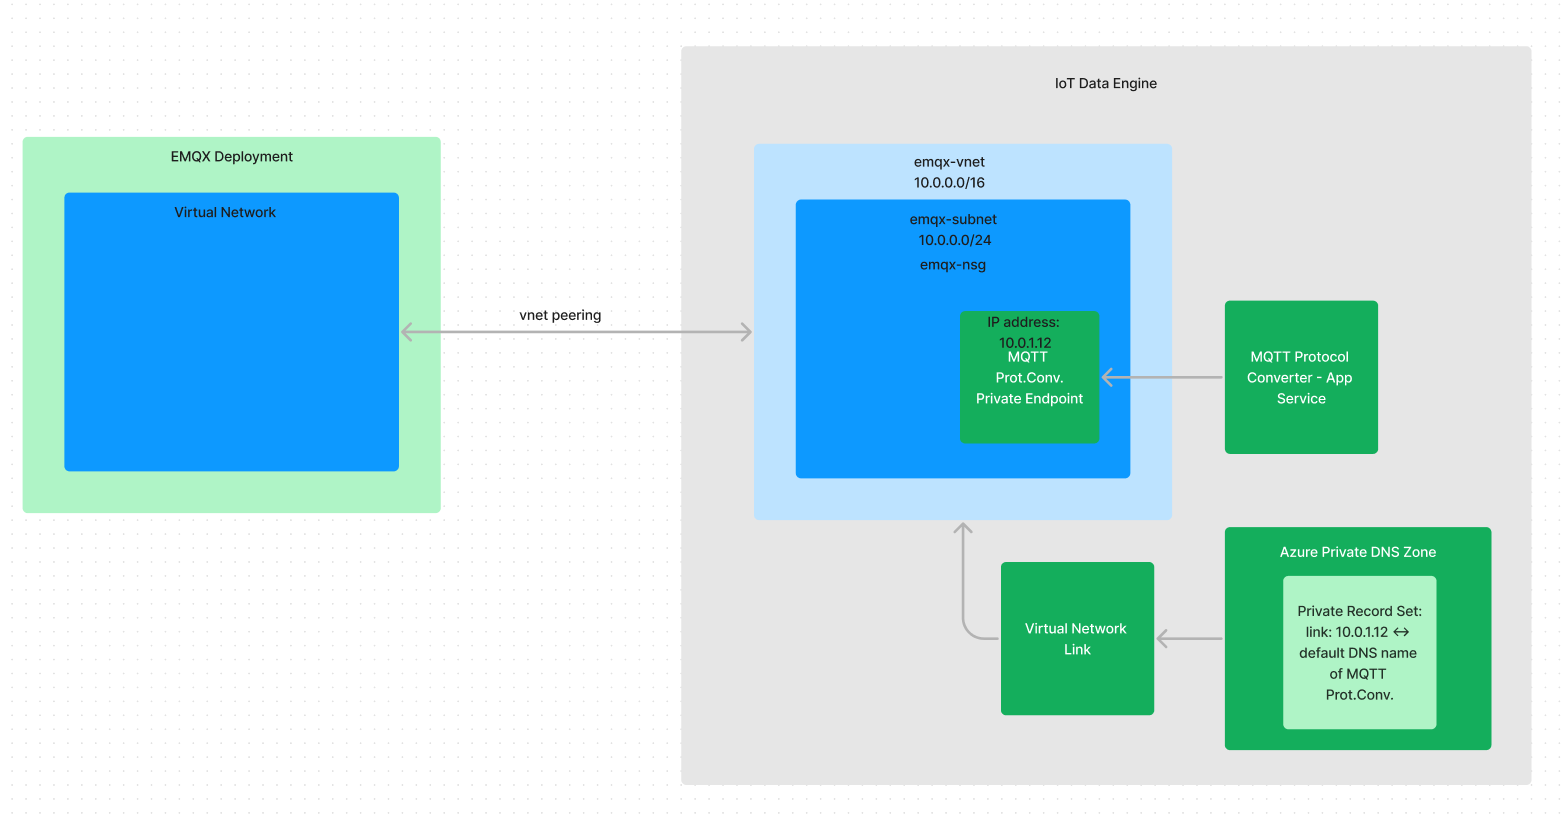
To make the peering possible, the EMQX needs to have created a Service Principal in Proximus AAD, a custom role and role assigned to the IOTDE's Vnet to which the peering will happen.
As we don't have privileges, those operations have to be executed by O365 OPS team, currently we're doing it with Maarten Faes.
To obtain the CLI commands needed, the UI of EMQX comes in handy.

Next the Vnet properties needs to be filled in and the UI will display needed commands (to be executed by O365 OPS).
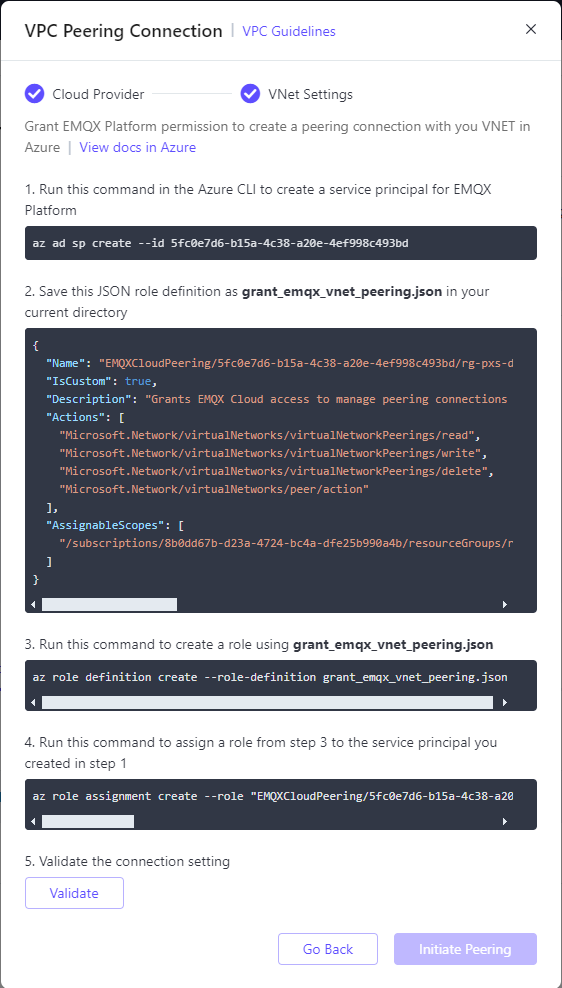
Once the set up is done, validate the connection and initiate peering.
Once it's finished successfully, you should be able to see peered EMQX virtual network.
To check that go to virtual network of Data Engine -> Settings -> Peerings.
Map DNS to private IPs in the peering
Once peering is done, the last step is to ask EMQX team (via ticket) to map IP address of App Service private endpoint to its FQDN.
Normally the backend service and MQTT protocol converter should have already created all configuration.
That should be visible in Virtual Network -> Settings -> Connected devices.
Same can be verified in the Private DNS zone deployed in the same resource group.

The FQDN is the URL that the App Service is normally available - value can be found on the App Service overview -> Default domain.
EMQX side configuration
Basic Config
In order to configure the data flow between EMQX and MQTT protocol converter, the following steps should be executed:
Go to
Data Integration.Create a new
Connectorof typeHTTP Server: set URL as the FQDN of the application withhttps://prefixCreate a
Rule:a. set simple SQL rule for incoming messages:
    SELECT
        payload as payload,
        clientid as clientId
    FROM
        <topic-name>
b. choose
Action: your connector name
Test
In order to test, a MQTT client app of choice should be used, for example MQTTX.
Little manual for MQTTX config:
- Connection should be created for
MQTTprotocol on port1883. - The
usernameandpassword, should be set according to theMQTTdevice created inData Engineand registered inIoT Hub. - Once connected, you should set the name of the
topic(same as topic name in Rule settings). - Create a test message (JSON format).
- The messages should coming through and visible in logs of
MQTT protocol converter.